Categories
Wholesaling

Paperwork Made Easy: The Important Details Every Real Estate Wholesaler Should Look For

The buyer, seller, and wholesaler hashing out a contract.
Photo by Pexels

When conducting wholesale deals, contract negotiations become an everyday occurrence in your life. This means that if you aren’t knowledgeable about the requirements and details of wholesale contracts—you can end up losing a deal.

You have to be exceptionally familiar with contracts to be a successful wholesaler, which is why we’re writing this article to dive deep into the key paperwork you’ll need. Nail these on the head, and you can navigate through the world of real estate wholesaling with ease.

What is A Buy and Sell Contract? 

Otherwise known as a purchase agreement, this is the contract you enter with the seller of the property. It acts as a legally binding agreement and outlines the terms of the offer between a buyer and seller in real estate transactions. 

Your job as the wholesaler is to act as a middleman and find a willing investor to buy the property. That means to need to know how this is the contract permits them to purchase the home. Once you find a buyer, this contract transfers from you—the wholesaler—to the buyer. 

The content of the buy and sell contract should have the following: 

  • The date of the agreement 
  • The name of the seller/individuals listed on the property’s title
  • The buyer’s name
  • Property address 
  • The earnest money deposit. 
  • The total purchase price of the property
  • Financing 
  • Closing date and transfer of title 
  • Escrow and closing fees 
    • The buyer can be assigned to pay the fees
    • Or it can be the seller 
    • Or they can pay equally 
    • Or they can pay their respective escrow and closing fees
  • Signatures of you and the sellers
  • Date of signature

This list isn’t exhaustive, but these are the most relevant things you should pay attention to in buy and sell contracts. As long as you have these covered, you should be good to go.

Note that your buyer will also thoroughly examine the agreement before getting into the deal with you. As such, it’s best that you know your way around these contracts well enough to answer their questions and successfully close the sale.

What Is A Seller’s Disclosure? 

The State of Michigan requires a seller to complete and sign this disclosure to accompany any and all purchase transactions. It’s meant to protect a buyer from seller misrepresentation about the condition of a residential property.

Since most sellers aren’t aware of this form, you’ll want to keep a copy with your buy-sell contracts. Do NOT ever complete the form though, for a seller—legally they must complete it.

The next one to know is an assignment agreement. 

What is An Assignment Agreement? 

An assignment agreement is a real estate contract that transfers your rights and responsibilities listed in the purchase agreement to your investor—the new buyer. Often, this can also be referred to as an “Assignment of Real Estate Purchase and Sale” agreement.

After signing this contract, the buyer will take over the purchase agreement, and you’ll be awarded an assignment fee. Only you and the buyer will receive copies of an assignment agreement since the seller is not involved in completing an assignment contract.

An assignment contract needs to contain the following: 

  • The agreed-upon assignment fee
  • The assignor’s name 
  • The assignee’s name
  • The date of agreement on the purchase contract
  • The names on the purchase agreement
  • Location of the property 
  • Closing date 
  • Assignee to pay the security deposit in escrow 
  • Signatures of you and the buyer 
  • Date of signature

Once the assignment contract has been signed and fulfilled, the investor will then take over the purchase agreement. After that, the buyer closes on the property and you’ll be awarded your assignment fee.

Wholesaling Contracts Made Easy 

There’s a lot of paperwork that comes with wholesaling in the real estate business. If you get in over your head and gloss over every other contract you get into, you can end up losing your wholesale deals—or worse—alienating your potential buyers. 

If you ask us, it’s just not a risk worth taking if you want to grow your wholesaling business.

With our help, you’ll have a good idea of how the contracts you’ll be dealing with regularly are done. If you need more help with wholesaling paperwork, feel free to reach out to us!

Have any questions about wholesaling contracts? Let us know in the comments below!

Categories
Landlords

Tips and Tricks for Managing the Property Maintenance of Your Home

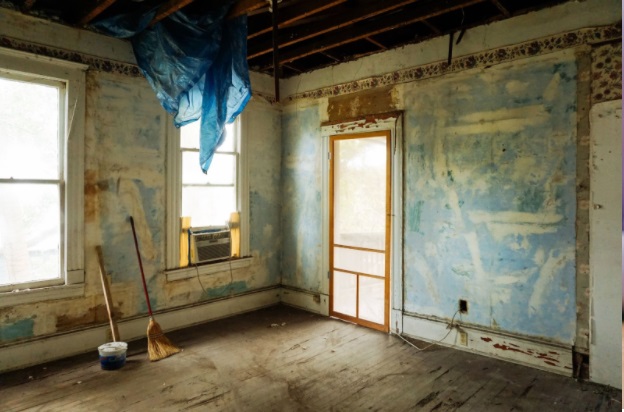
 poorly maintained rental property
Photo by Payam Moghtader

Nobody wants to live in a dilapidated home. We all want a place where we can come home to an environment of relaxation and comfortable living—certainly not a messy, broken-down house that’s far from being stress-free.

This means that, as a landlord or homeowner, you need to treat your property with care to ensure it lasts for decades to comes. Tenants won’t want to occupy your rental property if it’s falling apart and neither will you. You need to perform frequent maintenance on your rental property, and do everything you can to protect your hard-earned assets in the long term.

In this article, we will discuss some tips and tricks to keep your property in tip-top shape.

5 Tips for Maintaining Your Rental Property 

First thing’s first, maintaining your property is mandated by law. If you are located in Michigan, you are liable under the warranty of habitability law to keep your rental property liveable

The law states that a landlord must abide by 3 factors:

  1. The property and all common areas must be fit for use.
  2. The property must be kept in reasonable repair while under a lease. 
  3. The property must comply with health and safety regulations. 

If you don’t follow the warranty of habitability law, tenants can either withhold rent until you make the repairs (no income for you!) or resort to repair and deduct—where they’ll make the repairs themselves and deduct the costs from rent payments. It may deceivingly sound convenient, but experienced landlords know that leaving repairs to tenants likely means cheap fixes and short-term solutions.

By following the law, you can avoid consequences and protect your properties.

To help keep in line with the warranty of habitability law, here are best practices to maintain your rental property.

1. Establish Easy Communication with Your Tenants

The first step to keeping your rental property maintained is to communicate with your tenants if you aren’t living there. Your tenants will be the ones living in your rental, which means they are the first to find any need for repairs. Plus, you don’t want to leave a problem unattended for too long, or it becomes permanent damage.

Having regular communication with tenants is important for catching necessary repairs immediately

Always provide a way for your tenants to get in touch with you easily. Your goal should be to make it easy for you to get ahead of important repairs before they cause major damage.

2. Perform Regular On-Site Inspections

Schedule a yearly inspection with your tenants or for yourself so you can have a frequent, in-person idea of the status of your rental. Getting an expert to help is also not a bad idea. You should look out for tell-tale signs of property damage, like the following:

  • Broken windows and screens 
  • Leaky plumbing 
  • Discoloration on walls and ceiling 
  • Burn marks around sockets 
  • Malfunctioning smoke detectors and fire extinguishers

Your goal in performing regular on-site inspections is to catch any signs of water damage or gas leaks that can lead to costly repairs down the road.

3. Schedule Periodic Pest Control Visits

Pests are one of the most damaging factors to a property. For instance, do you know that the US spends over $5 billion yearly for termite repairs? That’s a lot of money spent on dealing with termites that can certainly be avoided.

So, take a preventive approach by scheduling pest control maintenance once every 3 to 6 months. Have an exterminator visit the property and extinguish any possibilities of pest infestations, so you don’t have to worry about little damaging critters occupying your rental property.

We understand that regular pest control visits can be costly to your business. But, it’s a cost worth taking, especially when you consider the more-expensive alternative of dealing with existing creatures.

4. Opt for a Professional Landscaper 

Not only does great landscaping help entice new tenants if you’re renting it out, but it also keeps your existing renters happy and helps you avoid many problems down the line. You can always maintain the lawn yourself, but hiring professional landscapers will give you benefits such as:

  1. Preventing pests from making a home in the lawn and trees
  2. Avoiding debris accumulation that can harm your plumbing system
  3. Protecting the structure of the home from nature-related issues (e.g., falling trees or overhanging branches that pose harm)

Plus, professionals will have the skill, experience, and equipment to keep all lawns, gardens, and other green areas of the rental property beautiful and functional. Many other benefits come with maintaining the landscape, but the biggest benefit is that you’ll beautify your home.

5. Hire Heating, Air-conditioning, and Ventilation (HVAC) Specialists

One of the main systems that keep a property habitable is the HVAC system. If the system fails, it becomes very difficult to live on the property. Just imagine going through winter without any heating or sweating in the summer with air-conditioning, and you’ll know what we mean!

Moreover, if an HVAC system fails, the entire cost of replacing everything can range from $5,000 to $10,000. In other words, shouldering the costs of regular maintenance is definitely better than having to replace an HVAC system eventually.

Consider hiring professionals to perform annual maintenance and constantly remind your tenants to clean and replace AC filters whenever necessary. Your goal is to avoid having an HVAC system breakage while keeping your tenants living comfortably.

Take Preventative Care of Your Property 

Living in a rundown home is one of the worst things to experience. A home with no heating, full of pests, and faulty toilets is a nightmare no one wants to experience. Not only will your tenants leave right after the lease if you’re a landlord, but failing to maintain your property also means violating Michigan laws that will cause to recipe some financial penalties.

Instead, be more proactive. Keep your rental property well-maintained, stay on top of arising problems, and do everything you can to ensure that your property lasts a long time. The more you maintain your assets, the farther they’ll take you in terms of investment.

Do you have any other property maintenance tips that you’ve found useful? We’ll love to hear about it in the comments section below!

Categories
DIY Landlords

Investing in Real Estate from a Property Manager’s Perspective

Executive Summary

Many real estate investors self-manage their properties and I did too learning from my experience as I went. However, professional property managers have a lot of experience to help both new and seasoned real estate investors make the best investment and property management decisions. I asked my property manager, Jill Powell, of 1st Choice Real Estate, PLLC to share some of her insights into what investors should be considering.

Property Management Considerations Before Purchasing

Interestingly, all of the suggestions from my property manager come before purchasing the property. Thus, education and preparation are key to success in real estate investing. However, from my own experience, there are things that you just cannot anticipate and only experience teaches you.

15 Things to Consider Before Making that Next Purchase (in no particular order)

  1. New property investors should not buy older homes that have been turned into multi-units with all utilities included. These properties are often efficiencies or one bedroom units with transient tenants. You will have sky high turnover and sky high utility bills. Plus, you can’t hold anyone responsible for leaving the junk sofa on the curb that you now have to pay to have disposed.
  1. If you buy in a college town, have the parents co-sign.
  1. Always run prospective tenants’ credit and have a good way to score the rest of the application findings. Make sure the application is complete and all steps followed—no cutting corners or exceptions.
  1. If you don’t have a lot of spare time or don’t enjoy tenant calls at 3 a.m., when their heat goes out in Michigan in the winter, think about hiring a property manager. After self managing at first, I now buy my properties with the intent of having a professional property manager help me run my rental business.
  1. Use a cashflow or deal analysis spreadsheet prior to writing your offer. My property manager has seen many out of area investors pay for inspections only to walk on the deal once they find out what the local taxes will be after buying, local cost of the rental licensing and the true cost of rehabbing the property. It pays to have a professional on your side. I always have my property manager weigh in and be involved prior to making any offers. They are a valuable part of my team.
  1. Use a local Realtor who specializes in rental properties. They can tell you not only what is happening with property values and market rents in the area but also things like is there a moratorium prohibiting rentals in that subdivision, a limit on the number of unrelated persons in a property or a limit on the number of pets a tenant/owner can have in a property in that area. 
  1. Get the details from your lender before making the offer so you have the exact downpayment number as this will affect your rate of return.
  1. Start slow and learn from each property.
  1. Investing in real estate is not a way to earn “passive income.” It is a very time consuming business unless you use a property manager.
  1. Be cautious purchasing rental properties with tenants in place. Ask for a tenant ledger. Ask for current photos or, better yet, inspect all units personally. Look up rental/tenant violations for the property historically. Drive by the property at multiple times of the day to see how the tenants maintain the property.
  1. Research rental rates for the area. Just because the listing says they can get a certain rent doesn’t mean they actually are—verify it against market rents.
  1. Know the local laws regarding “discrimination based on income source” for things like section 8 vouchers.
  1. Decide if student housing is right for you. You will have high turnover, higher costs to get the property ready to re-rent and potential issues locally if the tenants like to party.
  1. Have a good CPA. They can help save you a lot of money and understand the tax implications of the investment.
  1.  Make sure you understand the local rental laws where you purchase property.

Conclusion

A professional property manager is a valuable part of any real estate investor’s team. Even if you self-manage your properties, you can learn from their experience to make the best investment and property management decisions before you buy your next property.

About the Author

Categories
Landlords

Why Cheap Houses Aren’t Always Profitable and How to Buy Ones That Are

If you’ve been participating in real estate forums and websites for a while now, you’ve likely noticed that new investors are often interested in buying the cheapest house they can find. In addition to getting a better Rent-to-Price rate, they believe that buying cheap will save them money on closing costs and property taxes. But there’s much more to investing than the purchase price of a home.

Cheaper houses may seem appealing on paper (or laptop screens), but it’s important to consider all the implications that come with them. And if you still decide to buy one, you need to understand what you’re getting yourself into.

Otherwise, you risk buying an asset that actually loses you money instead of bringing in a profit. 

Why Cheap Houses Are Rarely the Best Idea

The term “cheap” is relative to your perspective and can vary from market to market. Even so, whether it’s buying a home for $40,000 that rents for $700 or anything similar, buying cheap homes goes against these four pillars of conservative investment.

The 4 Pillars of Real Estate Investing

These are the crucial pillars you need to be aware of when purchasing a property:

  1. Capital Preservation: As a conservative investor, you want to protect your money and avoid loss within your portfolio. In exchange for large returns, you prioritize investment security and stability.
  2. Stable Cash Flow: You want to have the assurance of positive cash coming into your investment business. This way, you’ll increase your assets and have the funds for daily operations.
  3. Appreciation or Equity Gains: Aside from cash flow, you also want to gain equity as your property increases in value over time. This allows you to make a profit once you decide to sell.
  4. Tax Benefits: The biggest tax benefit of purchasing real estate is in the form of deductions. These come from property tax, mortgage interest, repairs, operations, and depreciation.

Why are cheap properties against these pillars? Well, it’s because they tend to come with a host of problems, some that you might not have considered. Here are a few problems and limitations you’ll face when going with a cheap property:

  • They’re located in areas leaning towards economic decline.
  • They have poorer tenant payment performance, leading to higher eviction costs.
  • They have higher tenant turnovers and RentReady costs.
  • They often come with underlying deferred maintenance issues.
  • They are harder to insure, since the cost of replacing the property often exceeds its insurable value.
  • They are difficult to secure lending for.
  • They come with limited exit strategies.

These reasons show why buying cheap isn’t always the smartest strategy. Going for a slightly more expensive property (like a Class C instead of a Class D) might take a bigger chunk out of your savings upfront, but it’s often a smarter choice in the long run.

Of course, if you’re still planning on purchasing a cheaper property, here are some factors you need to prioritize.

How to Approach Buying Cheap Properties

Not all cheap homes are traps, but you’ll need to know how to spot the good ones. You don’t want to end up with a decrepit building that eats up your savings. So, when buying cheap properties, make sure to do the following:

  • Invest in Up-and-Coming Areas: Cheap properties are often on the outskirts of town, so ensure that it’s an up-and-coming neighborhood with a growing population and economy. This way, the property will retain its value and increase over time.
  • Anticipate Necessary Repairs: Since cheap homes often come with underlying problems, you should work with a professional inspector and licensed contractor. That way you can easily manage the complications and accurately estimate necessary repairs.
  • Check the Neighborhood and Tenant Pool Class: Ensure that the area attracts quality renters who will follow lease agreements and take care of your property. Cheap properties are often in lower-class neighborhoods, which means lower-class tenant pools, as well.
  • Run the Numbers: Conduct proper real estate analysis to ensure that the numbers make sense. Here are a few calculations to get started:
    • Net Operating Income (NOI): This number should show a favorable balance of income and expenses. Compare the NOI to similar properties in the area to see if you’ll also have high revenues and small expenses. 
    • Cash Flow: How much money will you pocket? The monthly rent you can charge should be 1% or higher than the purchase price to indicate strong cash flow generation. Buying a cheap property that can only demand so much rent defeats the purpose of investing in one, as you won’t have the rent-to-price ratio you expected to enjoy.
    • Cash-on-Cash (COC) Return: The higher the COC, the more the property can pay for itself. A good rule of thumb is to have a COC that’s higher than 10%.
  • Have a Great Management Strategy or PMC: It’s relatively easy to manage Class A & B properties because the tenant pool is higher demographic. Class C & D properties on the other hand, require a LOT more attention to be successful. You’ll need a solid plan to handle the inevitable tenant issues or hire a great (not just good) property management company. 

There are many other calculations to run, but these three should get you started on the right foot.

Conclusion

Cheap properties can create significant profits and become excellent investments when done properly. But if it only sinks you into debt, you might look back and wish that you spent your money on a safer investment opportunity instead.

As always, we suggest you do ample research and consult with other investors. When you do go with cheap property, make sure your purchase gives you results that are worth the risk.

What’s your experience with buying cheap properties? Share your tips below.

Categories
Landlords

Should Tenants Be Allowed to Make Home Improvements?

Nothing is worse than having a tenant who took “please feel at home” way too seriously.

While some tenants will only install their own wall decor or child safety latches on kitchen cabinets, some tenants make more permanent changes to the rental without your permission. This creates a whole lot of trouble—broken lease agreements, depleted security deposits, and costly restorations when they finally move out.

So, should tenants be allowed to make home improvements in any circumstances? Let’s look at some considerations.

Common Home Improvements to Expect from Tenants

Here are some examples of rental property alterations often done by tenants:

  • Painting the interior walls
  • Changing light fixtures
  • Changing appliances
  • Installing new locks on doors
  • Upgrading security systems
  • Changing the landscaping/garden

While these changes may be considered an actual improvement or upgrade to the property, you need to ask yourself the following questions before allowing them:

  • Will your tenants do a good job? They may not have the skill to carry out the project and may not adhere to safety or industry standards.
  • Who will pay for the improvements? They might expect a decrease in rent due to work done and materials used—even if the changes made are not up to par. 
  • Can you reverse the renovation? It’s possible that they deviate from the purpose of the original design (e.g., laminated floors are easier to clean than hardwood, simple landscaping is easier to maintain, etc.), which could require reversals in the future.
  • What does the lease state? Allowing them to break agreements might lead to them pushing their luck—further ignoring other clauses beyond just home improvements. 

You need to remember that your rental property is an investment—one that you should take ownership over, improve, and maintain according to your standards. Moreover, your tenants should see the importance of adhering to the contract and, ultimately, respecting you as their landlord.

What to Do If They’ve Done It Already

Should you discover that they’ve already made the improvements without authorization, here are three steps that landlords should do:

  1. Send a written notice of the home alteration, expressing your disappointment that they did not notify or seek permission before implementing the changes. Point out the specific lease clauses that they have violated.
  2. Warn the tenants that there should be no further changes done to the property without permission and that you’ll happily consider any changes they might still want to make.
  3. Outline the consequences of their action. This could range from just a fair warning to requesting that they reverse the renovation made—at their expense. If the alterations are extreme, you can deduct the cost from their security deposit upon Move-Out or proceed with eviction due to lease violation.

How to Prevent Tenants From Making Unauthorized Home Improvements

As they say, prevention is better than cure. So if unauthorized home improvements have been made by your tenants, make sure to review the lease agreements. Ensure that the following lease clauses are clearly stated:

  • Improvements that can only be done by the landlord or with landlord’s written permission
  • Improvements that can be done by either party
  • Consequences for alterations that devalues the property

Your goal is to create a space for tenants to freely improve their living conditions while being firm and clear with the boundaries. Even if you lucked out this time and the tenants did a great job improving the home, an unclear lease will open you to future problem alterations…and your luck may just run out.

Conclusion

Every rental property will need renovations and improvements from time to time. From repairing to re-flooring, landlords need to stay on top of their rental properties and make the necessary renovations when needed.

If your property can use a bit of work and you see that the tenants are capable of doing a good job, you should have no problems allowing them to improve the space. The bottom line is to make sure that they understand the boundaries and adhere to your lease agreements, and you should be good to go.

Do you allow your tenants to make home improvements? What are your non-negotiables? 

Image Courtesy of Polina Tankilevitch

Categories
Flipping

How to Find the Ideal General Contractor to Flip Houses

Finding a general contractor (GC) for your house flip can be challenging.

You want someone who knows what they’re doing, is trustworthy, has affordable prices, and has good reviews. This means you need to do proper research before hiring a general contractor—don’t hire the first one you find!

As a flipper, your main goal is to earn a high flipping profit in return for your investment. To do that, you need to renovate the house within a specific budget and timeframe, which means using contractors who stick to deadlines and understand the importance of flippers’ margins.

While simple repairs are easy to budget for and can be done within a month, more complex renovations can easily incur budget overruns and take more than a couple of months to complete. In these cases, it’s best that you hire a general contractor to handle the project for you, or assemble a team of go-to contractors that you work with regularly on your flipping projects. Which you go for will depend on your needs, but this article focuses only on general contractors.

Let’s go through some best practices for finding the ideal general contractor for your flip projects.

Independent Contractor vs. General Contractor

Before we go any further, it’s important to make a distinction between independent and general contractors:

  • Independent Contractors: These are contractors that you directly contract to perform tasks on a contractual basis. They complete the project themselves, without the help of subcontractors.
  • General Contractors: These are also directly contracted; however, tasks are subsequently contracted to subcontractors to complete. They complete the project along with their subcontractors instead of completing the project by themselves. They also handle all the administrative tasks needed (e.g., paying subcontractors, securing building permits, getting insurance for all workers, etc.).

General contractors will coordinate with necessary subcontractors on your behalf and oversee the project for timely and on-budget completion. They are ideal for major renovations and flips, because you can get all aspects of the renovation handled by a single entity.

What to Look for in a General Contractor

Here are the key things to look for in a general contractor:

  • A Good Reputation: The best way to find a general contractor is by asking for recommendations. Contractors work largely based on referrals. Ask your friends and the real estate community if they can vouch for somebody reliable, communicative, and punctual.

Once you have a list of options, go the extra mile to read online review websites and visit the Better Business Bureau to check their reputation and ask about the projects they’ve worked on before. 

  • A Good Contract: Hiring a GC on a handshake is not a good idea. You’ll want a contract that spells out what they will do and what you will do, with deadlines. The more thorough the better! Otherwise, there’ll be no accountability and your project can go sideways quickly.
  • Appropriate Payment Practices: A good general contractor will accept payments in the form of checks and wire transfers. They would also agree to sign a lien release before payment and negotiate with you on the payment schedule.

Stay away from contractors who want you to pay in cash or a lot upfront. Cash payments are not illegal; however, contractors who ask for them might be avoiding paying income taxes. This is a practice done by less-than-reputable contractors. Moreover, a down payment of 30% of estimated costs is typical to cover an initial retainer and materials, but an established contractor won’t need your full payment to start the job.

  • Local Coverage: Hiring a general contractor who lives and operates within the area of your flip is your best option. They will know the local building codes, city inspectors, have a network of subcontractors ready to help them, and you can easily contact them in the event of an emergency.
  • Proper Licensing: General contractors need to be licensed to pull the necessary permits for your property. Without these, your property won’t abide by the local building codes or pass inspection. You’ll end up financially responsible for bringing up the property to the required standards.

Instead, verify their license by asking for the license number. Check it with your state’s licensing board. For licensure information in Michigan, visit the state’s Department of Licensing and Regulatory Affairs website for details on the Bureau of Professional Licensing’s requirements.

  • Proper Insurance: General contractors should be insured for General Liability Insurance and Workers’ Compensation. You can ask to see a copy of their policy and call up the insurance company to verify the information. The insurance should be current and have clear policy limits for you to check. You should also be added as an “additionally insured” on their policy, until your project is complete.
  • Warranty in Writing: General contractors should provide warranties that cover the work they’ve done in your property. A warranty assures them that they won’t be coming back for multiple repairs over an extended period of time (warranties typically last one year only) while guaranteeing you a good renovation result.

This list isn’t exhaustive, but it’ll put you on the right track in finding your ideal general contractor.

Questions to Ask During the Interview

As part of the process, you should also have an interview with the general contractor. Here is a list of questions you can ask to help you identify those who’ll fit your criteria:

  • How many people work for you? How long has your crew been working together?

You want to work with an established company that has a large team of managers and assistants.

  • Where are you operating, and what is your service coverage?

You want to work with a local company that knows its way around renovations in the area.

  • What similar past projects have you completed?

You want to see their experience concerning the project you’re giving them. If they’ve never done what you need them to do, ask them how they will approach the project.

  • How do you communicate with your clients?

They should give you daily or weekly progress reports with photos and send itemized, detailed quotes and invoices.

  • For this project, will you be using subcontractors or just your own team?

If they are using subcontractors, make sure that all workers are trained, licensed (if applicable), and insured.

  • Are you licensed and insured?

Licenses should be updated and registered in the state where your property is situated. Insurance should include General Liability Insurance and Workers’ Compensation.

  • What would our contract look like?

Not all general contractors will have contracts. If they don’t, you can draft one up. Regardless, have your lawyer review it before everybody signs.

  • Will you provide warranties?

Make sure the warranty is written down and will conform to the requirements of the contract.

  • How will the payment schedule and plan work? Will you agree to sign lien releases?

Agree and sign the payment schedule before the job begins. They should agree to sign lien releases before payment.

  • Have you ever had to deal with lawsuits?

If they’ve been sued, ask what happened and how they handled it. If they’ve sued a client, ask for further information and check public records. If they’ve had serious accidents before, ask how they dealt with the situation and what they’ve improved to make sure it doesn’t happen again.

Conclusion

We hope this article is enlightening and helpful in your search for a general contractor. It might take a lot of effort, but having a reliable and skilled general contractor will protect your budget and timeline for a successful and profitable house flipping project.

The better your general contractor, the more houses you can flip fast, at the highest quality, and for the most competitive price.

Any additional tips for finding the ideal general contractor as a flipper?

Image courtesy of Andrea Piacquadio

Categories
Landlords

How Landlords can Easily Raise Rents

Many landlords dread raising rents on their tenants for fear of the tenants moving, or the landlord just finds the whole process unpleasant. So, it’s not uncommon to find landlords that haven’t raised rents in 2, 3, or more years. 

Raising rent is actually a regular (albeit not the most fun) part of being a landlord. A landlord should raise rents as the market dictates, because: 

  • Keep up with inflation
  • Be able to afford rising maintenance costs
  • Accommodate property tax & insurance increases
  • When you’ve renovated a property to a higher standard

When that time inevitably comes, you need to know the right way of increasing your rent. Doing it the wrong way might cost you, tenants, leading to longer vacancy periods and costlier turnovers. Plus, no landlord wants to feel like the bad guy, so it’s important to show you’re being fair by handling rent increases diplomatically.

This article will teach how you can raise rent amounts and generate more income while communicating the situation professionally to your tenants. We’ve even included a sample rent increase notice that you can use for informing your tenants as amicably as possible. 

How should you approach a rent increase?

Depending on local and state laws, the required notice period for rent increases can range from 30 to 120 days. In Michigan, you have to give 30 days’ notice, but if you’re raising rent by 10% or more, you have to inform the tenant 60 days ahead of time.

Most people draft a letter informing tenants of the increase (like the one we’ve included below) and send it out to them, but there’s another way to approach this: 

  1. Go on Zillow, the MLS, or Rent-o-Meter to find what the market rent for this property is.
  2. Compare that to what the tenant is paying.
  3. Submit that information to the tenant and ask them what seems fair in terms of an increase

Note: At this point, you haven’t told them the rent was going up, but you’ve implied it. You’ve also involved them in the decision, so they’re more willing to accept it, making this a more subtle, non-aggressive approach to raising rent.

  1. The tenant’s response will typically be to offer 50% of the full increase, although some will say they don’t want to pay any increased rent at all. A good way to address either of these scenarios is to ask: “Why do you think that low of an amount is fair?” Make them defend it. 
  2. Then they’ll explain why they shouldn’t pay an increase (personal emergencies, poor maintenance on your part, etc.). Then you can ask: “Are you sure that’s your best offer?” 

The best part about this is that it lets you raise rents without TELLING the tenant there will be an increase, but rather including them in the process.

Tenants may even surprise you by offering more than what you expected! 

How much can you increase?

Ideally, you’ll want to keep the raise to less than 5% per year. Any higher, and your tenants will most likely move away—even if the rate is similar to your competitors in the market.

Why?

Think of the other rule of thumb that’s often used in screening tenants: rent amounts should only be a third of the tenant’s monthly income. This means most people can’t afford to spend an additional hundred dollars a month on rent payments – unless the tenant base in your area is on the up and up, like because of new employment opportunities or developments nearby.

Jacking up the amount too high without good reason will therefore jeopardize your rental income, as tenants will struggle to pay fully and on time. 

Plus, once a tenant has been there a while, they feel entitled to zero rent increases forever. If you raise it from $800 to $900 overnight, they’ll freak out. Even if the rent in the area is $1,100, they can’t afford it. So you’re better off with consistent smaller rent increases, like $25 a year, rather than waiting 3 years and increasing your rent all at once to reflect current market value.

On top of this, some cities have rent control laws in place. These maximum rent caps on what landlords can charge and are implemented by the government. Be aware of your local regulations before implementing any rent changes (just FYI, rent control isn’t allowed in the state of Michigan, but it is common in markets in New York and California).

Sample rent increase notice

When you’re ready to implement the raise, here’s a sample rent increase notice that Colleen F. shared in the BiggerPockets Forums. This letter is great because it helps tenants understand the landlord’s own financial obligations and view an increase in rent as a necessary business decision, rather than thinking you’re just being greedy.

Feel free to use it as a basis for crafting your own notice:

Dear John Tenant,

Thank you for being a tenant here at 123 Main St, Apt 1. Our goal is always to provide a nice place to live, at a fair price. Whenever the prospect of raising rent comes up at any property, we take a good hard look at it to make sure it’s necessary.

In that light, we have decided it is necessary to raise the monthly rent on your unit, effective September 1, 2020, to $1,050 from $1,000. This is partly to offset the increasing cost of property taxes, insurance, high heating expenses, maintenance costs, and upgrades since our purchase of the building in 2010.

Even after this increase, we believe we are still at or below the average market rent for a unit of this type. Rather than pay an increase, you may choose other housing. Should you intend to vacate at the termination of your lease, the original lease agreement states that you have to provide 30 days written notice of your intent to move. If you choose, signing this form checking off that you will not renew and returning the form to us 30 days in advance of your expected renewal will be considered your written notice.

Sincerely,

Management

Conclusion

There’s no guarantee that your tenants won’t complain about an increase in rent. However, if you increase your rent fairly and strategically, you can manage their expectations and prepare them ahead of time to budget appropriately. 

When they’re prepared and you communicate openly with them about the situation, your tenants won’t see you as the bad guy for increasing their rent. 

Any other concerns related to increasing rent amounts? Leave a comment below!

Categories
Landlords

How to Market your Rentals Online: Screen Appeal and Listing on Digital Platforms

From digital walk-throughs to Zoom tenant interviews, real estate marketing has officially transitioned to digital in light of the COVID-19 pandemic.

Virtual showing techniques aren’t new, but COVID-19 has certainly pushed the industry to adapt as a necessity. Landlords that didn’t have videos of their properties pre-COVID are now rushing to create virtual tours and trying virtual staging methods.

At this pace, digital marketing will fast become an integral and permanent part of real estate marketing before we realize it!

What does this mean for landlords? 

Prospective renters are now viewing and shortlisting properties from their screens, making “screen appeal” a crucial factor to promote your rental property. You want your offer to stand out where the prospective tenants are: online.

In this article, we’ll go through the ways to increase your property’s screen appeal, write an effective ad online, and list your properties where tenants are most likely to find them.

Increase screen appeal with noticeable features

First, you need to make your rental look impressive in photos. To do this, invest in features that will stand out in photos—even if the prospect browses on their tiny phone screens. 

These are the things that will make a huge difference in digital listings:

  1. Sparkling kitchens with shiny appliances, glossy countertops, and newly-painted walls and cupboards
  2. Spotless bathrooms with new showerheads, clean mirrors, and re-grouted tiles
  3. Fresh blinds and curtains without any mold or grime that are updated to fit the aesthetic of the property
  4. Blemish-free walls freshly painted with a color that makes the room look bigger, brighter, and homier
  5. Brand-new fixtures everywhere—from light switches to faucets to doorknobs and fly screens
  6. Clean carpets that even look like they smell great
  7. Bright lights in every room to make the rental property feel new, and more importantly, show that you’re confident enough to put everything in the spotlight

Make sure that you use a camera that does your rental justice! None of the spectacular features you updated and cleaned will be seen if you use the front camera of your beat-up phone. If you need to hire a photographer for decent equipment, it’s worth the one-time payment to get a lifetime of great photos for your listing. 

Write an effective ad that highlights relevant details

Once you’ve updated your rentals with photogenic features, you need to post them on digital platforms. But what do you say? How do you write an effective ad that attracts your tenant pool? 

Here are the important factors to focus on:

  1. Write a great headline. Rentalutions’ formula suggests including the key information tenants look for (e.g., number of rooms or location) plus one feature that makes your rental unique.
  2. Use professional word choices that add value to your listing, as long as they’re an accurate description of your property. You want to avoid generic words such as “great” and “nice”, instead, choose words like: upgraded, spacious, tasteful, landscaped, modern, luxurious, and charming.
  3. Add more information on the key features. Knowing what tenants want (as you should), make sure to highlight these features in your ad. Are you expecting to attract tenants who put importance on parking spaces, walkability, nearby supermarkets, or proximity to a great school? Your copy should indicate that.
  4. Add detailed property descriptions. Similarly, also indicate what the tenants will want from the property itself. How many rooms, floors, and bathrooms? Will they be attracted to a lush backyard or extra storage areas? Flesh out all of the important details to attract tenants.

Lastly, prove what you said with great photos! When you use great photos to compliment everything that you verbally promoted on your listing, your screen appeal will skyrocket. This is where the prospective tenants should go “Wow! They weren’t kidding!”

List your rental on industry-popular websites

Armed with your impressive photos and well-written ad content, it’s time to post your listing where it matters. Most people are baffled by how many options there are to list online, especially since there isn’t a one-stop-shop solution that posts to all the rental listing sites. 

Zillow—the favorite of most landlords—allows you to create detailed listings that they’ll syndicate out to 26 partner sites (including Trulia, Hotpads, and MSN Real Estate), but it still doesn’t cover all of the sites available.

To get started, check these sites that are known to be effective and user-friendly:

  1. Zillow
  2. Trulia
  3. Hotpads
  4. Craigslist
  5. Facebook

Apart from those, you can also consider these lesser-known platforms:

  1. Apartments.com
  2. Apartment Finder
  3. Apartment Guide
  4. Apartment Home Living
  5. Apartment List
  6. Backpage
  7. Byowner.com
  8. Cozy
  9. Doorsteps
  10. Move
  11. My New Place
  12. Nextdoor.com
  13. Oodle
  14. Realrentals.com
  15. Realtor.com
  16. Rent.com
  17. Rentals.com
  18. Rentdigs.com
  19. Rentlinx
  20. Saletraderent.com
  21. Sublet.com
  22. Walk Score
  23. Zumper

All of these websites allow you to post for free. You just need to do some research and decide which platform enables you to attract the tenants that you want. For more details on the sites we mentioned above, check Smart Move and Landlordology.

Conclusion

Technological development waits for no one. In order to keep up and remain competitive in the rental property business, it’s time to level up with online marketing!

The steps are easy enough—simply increase your property’s screen appeal, write an effective ad describing the best parts of your property, and list them on websites where tenants are likely to browse for new homes.

Any other tips on how to market rentals online? Where are your rentals listed so far?

Image courtesy of Joshua Miranda

Categories
DIY

6 Fixes Novice Flippers Should Avoid DIY-ing

When it comes to DIY, “Why pay someone to do it when you can do it yourself?” is what most new flippers would say… at least until they realize how underprepared and underskilled they are for extensive repairs!

Some renovation projects are tough to do as well as a professional would, even with the best of YouTube tutorials. If you’re not qualified to replace roofs, repair electrical systems, fix the plumbing situation, or install new gutters, doing them yourself could lead to costly and dangerous consequences. 

Faulty work leads to spending more time and money trying to fix your mistakes, if you don’t know what you’re doing. Lots of seasoned flippers can do nearly any project themselves, but many more newcomers to the industry try their hand at things above their pay grade and end up regretting it later on.

So if you’re new to the world of DIY, here are six fixes that should be left to the professionals—even if you think you can do it yourself.

Roof Replacement

The fact that we refer to homes as a “roof over our heads” shows how important good roofing is for a home. Nobody wants to buy or live in a house with a damaged roof!

The roof is such a vital part of the infrastructure—you will want to make sure that it’s installed right to not cause any problems in the future. And while many people may think replacing a roof is easy, it really isn’t.

Here are just a few of the complexities you can encounter:

  • The height & pitch of the roof can require special safety equipment.
  • The underlayment is critical, but often done incorrectly.
  • Do you know what drip edge is for?
  • How do you prevent ice dams from causing roof leaks?
  • Unless installed by a licensed professional, most shingle warranties are voided.

Instead, you should hire a professional whose whole job is to replace roofing. Not only will they assess the roof before replacement, but they will also have all the suitable materials and tools for the job, as well as the much-needed experience in construction-related safety issues. A professional roofing company would also have warranties that can save you money in case something goes wrong.

Electrical Repairs

Repairing the electrical system of a home is another dangerous task to DIY.

In your house flipping journey, you might run into older homes with outdated or broken electrical systems. When that happens, you’ll want to spend extra on hiring a professional who has the training and experience to work with electrical currents—especially because they can be deadly when mishandled.

Feel free to install new light bulbs in the home, or to change light fixtures, plugs and switches if you’re a handy person, but anything more complicated than that should be handled by a licensed electrician. Here are the common issues often found in older homes that signal it’s time to call an electrician:

  • Replace electrical panels
  • Replace an exterior riser or the main feed from meter to panel
  • Messing with meters
  • Run underground electrical lines
  • Install a new circuit to an electrical panel

Plumbing Fixes

While improperly installed plumbing fixes aren’t as dangerous as electrical systems, they can seriously set your budget back and eat into your flipping profit. DIY-ing a simple leak might save you a couple of bucks, but if it escalates into a flood, that’s thousands of dollars instantly added to your expenditures. 

Beyond fixing a slightly clogged drain or replacing a new faucet, extensive plumbing repairs and maintenance are best left to the professionals. Here are some plumbing fixes that a professional plumber should do:

  • Replacing underground sewer or water lines
  • Replacing corroded stack or main supply lines
  • Replacing or repairing water heaters, sump pumps, and worn down or burst pipes
  • Running new drain lines, unless you know the exact pitch required by code

Drywall Mudding 

Drywall mudding is more artistic than people think, so it’s tough for non-professionals to do well. You can hang drywall yourself, because unless you totally butcher it it’s fairly uncomplicated to hang, but doing the taping and mudding takes an artistic touch.

Plus, even if you do manage to do your own mudding, it definitely will not be as seamless or aesthetically pleasing as work by a professional company. Ugly drywall is a serious eyesore which could turn buyers off from an otherwise beautiful house, so leave it to the pros.

Structural Repairs

We’ve all seen that part on the DIY home improvement show when the clueless flipper bashes through a load-bearing wall and almost caves the whole house in. 

Don’t be that guy. Structural repairs are one of those things which even pro flippers hire contractors for, because the cost of making a mistake is so high. Stay away from all structural work as a new flipper, including:

  • Bowing walls
  • Cracked floor joists
  • Bowed roof or ceiling
  • Removing walls for an open floor plan (are they load-bearing?)

Fixing or Replacing Heating Systems

Installing the wrong efficiency furnace or replacing with one that’s mismatched with the exhaust system could be fatal, literally.  For an 80% efficiency furnace, you use a particular exhaust, but if it’s 90%+, it’s a totally different exhaust system, which is not compatible with 80%-efficient systems. If someone gets poisoned with carbon monoxide in a home where you worked on the furnace, you’re liable.

The same applies with duct work. There are equations which experts use to calculate the type of ducting required, based on the size of the house, furnace type, distance from furnace, etc. Get it wrong and this could lead to a house that’s not heated well and puts more strain on the furnace, so it wears out faster.

Conclusion

Know your limitations, and you will save thousands of dollars – not to mention headaches! Even if you’re a crafty person who loves to learn new things, there are certain cost-cutting measures you want to avoid when it comes to flipping a home.

So, the next time you want to replace the roof, repair the electric system, fix the plumbing, or install new gutters in the home you’re flipping—grab your phone instead to protect your flipping profit as much as possible.

Image Courtesy of Suntorn Somtong

Categories
Shortterm Rentals

Cleaning Checklist for Every Short-Term Rental Landlord

Image Courtesy of Tirachard Kumtanom

End of stay cleaning can be frustrating for short term rental owners, especially those who manage their properties themselves. It turns out that “clean” is very subjective—what’s clean for one guest is a pigsty for another. And if they’re unhappy with the cleanliness of your property, chances are they’ll be vocal about it in the review they leave you on Airbnb.

To avoid wondering whether the property is clean enough to satisfy even the most particular guests, it’s crucial for landlords to have a cleaning checklist. A cleaning checklist doesn’t only help make sure your property is well-maintained and sparkling clean for the next guest – it also helps you stay on top of any issues or damages that outgoing guests may have caused.

Plus, if you’re hiring professional cleaners, the checklist can serve as a guideline for them to use when cleaning your properties, making sure they’re cleaned to the same high standard for every turnover.

Not sure how to start your checklist?

We’ve put together a general cleaning step-by-step guide that you can alter to fit your needs.

Bathrooms

  1. Clean:
    • Mirrors 
    • Windows
    • Floors and tile walls
    • Wastebaskets (don’t forget to put extra trash bags inside)
  2. Clean and sanitize:
    • Toilet
  3. Clean, sanitize, and scrub:
    • Showers
    • Bathtubs
    • Vanity sinks
    • Backsplashes 
  4. Refill toiletries:
    • Handsoap
    • 2 rolls of toilet paper
    • Makeup wipes or tissue wipes
  5. Replace with clean items:
    • 1 hand towel
    • 1 washcloth
    • 1 bath towel per guest
    • 1 shower mat per bathroom
    • Shower curtain liners (optional)
  6. Check if sinks, tubs, toilets, and faucets are running properly.

Pro tip: We recommend that you tackle one room at a time so you won’t miss out on any of these tasks.

Bedrooms

  1. Change sheets, blankets, and pillowcases.
  2. Vacuum floors, including under the beds.
  3. Check drawers, tables, and closets for personal belongings.
  4. Clean the mirror and windows and dust the furniture.
  5. Check for stains and wear and tear on the sheets and pillowcases.

Pro tip: One cleaning trick is to close the door of the room that you’ve just finished cleaning–this way, you’ll know which rooms still need cleaning and which you’ve already done. Plus, it will stop any wandering pets or people from going inside and messing up the beautiful work you’ve just finished.

Living Room

  1. Clean, dust, and vacuum the entire area.
  2. Dust:
    1. Furniture
    2. Picture frames
    3. Decorations on display
    4. Lamps
  3. Vacuum carpets or wash the floors with specialty cleaners.
  4. Place 2 standard pillows and 1 clean blanket for the sofa bed.
  5. Place the remotes, welcome packet, and other welcome items for the new guest in an easy-to-locate spot (like the center of the coffee table).

Pro tip: When wiping and dusting, the dirt will naturally fall to the lower furniture and the floor. Thus, it’s best to start cleaning from the top and work your way down to the floor.

Kitchen

  1. Clean:
    1. Counters and countertops
    2. Chairs and tables
    3. Sinks and backsplashes
    4. Glass doors and windows (if any)
    5. Appliance exteriors, including the coffee maker and toaster crumb tray (also check if they still work or are malfunctioning in any way)
    6. Inside and outside the refrigerator (and throw away any leftover food)
  2. Empty:
    1. Dishwasher and replace items in the cupboard
    2. Ice tray
  3. Sweep and mop the floor.
  4. Supply:
    1. 2 clean dish towels
    2. New dishrag, sponge, and soap
    3. 2 trash bags
    4. 1 roll of paper towels
    5. 2 dishwashing pods

Pro tip: Start cleaning at the area furthest from the door, and then work your way towards the doorway—this way, you avoid stepping on wet floors and dirtying them again on your way out of the kitchen.

Before Locking Up

  1. Turn off all lights and unplug appliances (except for the refrigerator, aircon, and TV).
  2. Set the thermostat to a temperature that doesn’t keep the unit running.
  3. Place patio sets and other outdoor items inside or in a covered storage area.
  4. Place trash bins by the road.
  5. Ensure that all doors are locked to prevent break-ins.
  6. Make sure cleaning supplies are well stocked.

Deep cleaning

  1. Clean:
    1. Exterior and interior of cabinets
    2. Lamp, lampshades, chrome fixtures, and display items
    3. Stovetop and range hood (and replace filters if necessary)
    4. Dishwasher
    5. Behind and under appliances and furniture
    6. Walls, baseboards, moldings, and tiles (and remove markings, if any)
    7. Door frames, switchplates, and other woodwork (remove any fingerprints or other marks)
    8. Windowsills, ledges, blinds, ceiling and electric fans
  2. Vacuum cushions and upholstered furniture.
  3. Deep sanitize sinks, countertops, and appliances (including oven and microwave).
  4. Wash windows and glass doors.
  5. Change air filters.
  6. Descale faucets and showerheads.
  7. Disinfect all surfaces and contact points.

Pro tip: Aside from the regular cleaning you do on your property between guests, you will also need to do deep cleaning once in a while. Deep cleaning ensures that your entire home is free from dust and dirt, which helps maintain your appliances at maximum efficiency (e.g. air conditioning units).

Conclusion

End of stay cleaning may be complicated and frustrating. But with a checklist that’s customized to your property and needs, it doesn’t have to be!

Checklists instruct professional cleaners how to make your property perfectly presentable for your next guest, and they can also help you make sure you haven’t missed a spot when doing DIY maintenance for your short-term rental. 

Going through after each turnover to make sure every box has been ticked on this list is your best bet at ensuring a 5-star cleanliness rating from every guest you host – and that’s a highly valuable thing to have when it comes to attracting new customers to your STR business.

How do you clean your property between guests? Are there other items that we should include in the checklist?

x  Powerful Protection for WordPress, from Shield Security
This Site Is Protected By
Shield Security